Painting Seagulls and Sand
12 July, 2016 2 comments Leave a comment
For the first time, last fall I taught a watercolour class with birds as the subject. I discovered they are fairly easy to paint if one has a well-composed, sharply focused reference photo.
Here are the steps in the painting:
Step 1: (see photo below) I demonstrated the classical method of enlarging the image, using proportional grid lines. Looking at one square at a time on the reference photo, I drew the subject onto the layout paper in the corresponding square, drawing everything twice as wide and twice as tall as in the original photo.
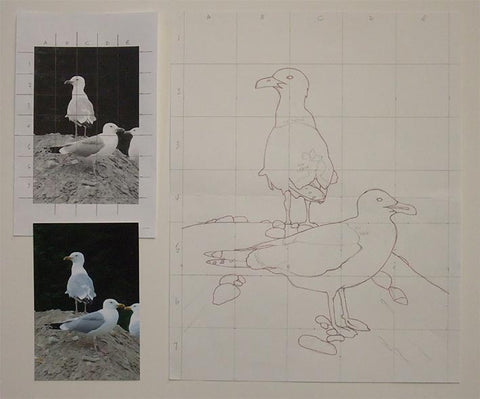
Step 2: (see photo below) Once the drawing looked correct, I traced it onto 300 lb cold press watercolour paper, using a graphite transfer sheet in between.
Using clear adhesive shelf paper and masking fluid, I protected the bird shapes. I also spattered masking fluid over the sand, using a tooth brush. The shelf paper and masking fluid keep the paper dry and clean while I paint the background, and will be removed prior to painting the bird and pebbles.
Once the masking fluid was dry, I mixed two neutral paint mixtures (one brownish and one grayish) using Indian Yellow, Prussian Blue, Cobalt Blue, and Permanent Alizarin Crimson. I wet the sand area, dropped in the two colours, and sprinkled on table salt.
The salt absorbs water and paint and is scraped off when dry, but it leaves behind an interesting 'starburst mineral' effect in the dried paint.

Step 3: For the background, I mixed a medium green and a very dark green using the four paints listed above. I moistened the paper with clear water, just in the areas that were to be lighter. Then I brushed the medium green mixture onto the wet areas, and the dark green mixture onto the dry areas.
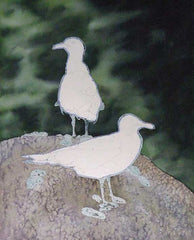
Step 4: (see photo below) The background had gotten lighter and duller when dry, so I glazed over it with Sap Green and added more of the dark green mixture to the shadow areas.
Once the background was fully dry, I removed the shelf paper and masking fluid. Using various mixtures of the original four paints, and with careful observation of the reference photo, I painted the bird feathers. I started with the lightest blue shadows and gradually built up to the darks, layer by layer. The beaks, eyes, and legs were done with the same strategy.
To complete the sand pile, I used a dark neutral mixture to paint the shadows cast by pebbles and large sand grains, and I scumbled over the sandpile with the side of a brush dampened with the same dark mixture. I painted the details on the pebbles using a fine brush.
To see a larger photo of the framed seagull painting Defending High Ground, click here.

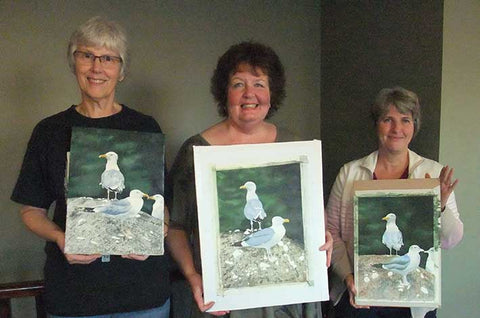
Here is a photo of my students with their paintings. Well done, ladies!
Subscribe to Karen's Newsletter for exclusive early access to new work, studio news updates, travel tales, painting tips, and notices of upcoming exhibitions.


Hi Karen
I have your book and admire your work. Just signed up for Cedar Waxwint workshops beginning October 19. Looking forward to painting with you.
Barbara
Loved hearing how you painted the seagulls on the sand. It’s a beautiful painting. Thank you for sharing.