As my husband and I explored the island of Newfoundland earlier this summer, we were thrilled to see the wildlife for which this province is famous: whales, moose, caribou, and puffins.
Today I am sharing our 'Whale Tales'. Sometimes their visits were brief and far-off, but on a few occasions I was close enough to take a video.
The photo above shows a baby Beluga whale surfacing at North West Brook, near Clarenville on the Bonavista Peninsula. The reason we were there to see it was because of a couple of tips from the locals.
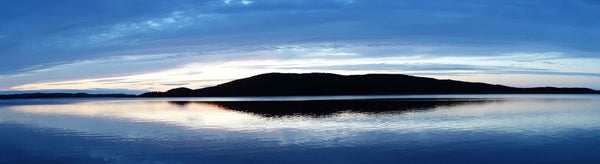
We were camped at a golf course that also had a small RV park, way out in the boonies near Hatchet Cove, which is on the north shore of the Southwest Arm of Random Sound (a long skinny fjord off of Trinity Bay). A lady at the Clarenville tourist info centre recommended we take a drive along the south shore of Southwest Arm on highway 204, because there was a very pretty fishing port out at the mouth of the fjord.

We took her advice the next day and thoroughly enjoyed the drive on a very hilly, windy, bumpy road out to Southport, pictured above and below.

On our way back, we drove into all the little hamlets and villages along the route. Some of them only had a handful of houses. One place with the charming name of Little Heart's Ease had a pull-off with a picnic table, on a high cliff overlooking Southwest Arm. The view was so stunning I had to stop for a photo. I'm pretty sure the spot was private property because there was a little house on the back lot and the friendly owner came out to chat with us.
She had lived in Ontario for a while but came back as a senior to live with her sister in Little Heart's Ease. While we were chatting, a neighbour woman called over "Did you see the whale?". We looked down at the bay again and, sure enough, in the distance we could see a whale surfacing (see its black back in the photo below).

The first lady let us know about a baby Beluga whale that had been visiting the marina at North West Brook for the last several weeks. She gave us directions to the marina and we eventually figured out how to access it and stomped our feet on the docks to call the whale. Amazingly, it surfaced near us within a minute and was about the size of a dolphin.
I made the 3-minute video below of the young whale feeding and swimming near us. (Please excuse the wind noise.)
While we were staying on the Avalon Peninsula, my husband heard on the radio that humpback whales were visiting St. Mary's Bay off of St. Vincent. We made a day trip down there and joined several other people on the beach watching the show from shore (see below).

According to the very informative plaque posted on this beach, each spring about 1500 humpback whales journey from the Caribbean to the shores of Newfoundland, to feed on the annual capelin spawn. In late June or early July, millions of tiny silver fish called capelin gather in the shallow waters close to shore. They come to mate and deposit their eggs in the sand.
During their stay at St. Vincent's, an adult Humpback whale consumes up to 2500 kg of capelin each day. The whales can be seen exploding to the surface with water and capelin pouring from their mouths.
We could see large flocks of seabirds feeding on capelin and about a dozen black and white whales jumping and spouting way out in the bay. Unfortunately they were too far out to photograph well.
We also saw Humpback whales and an iceberg in one spot, completely by coincidence, while staying at King's Point in north central Newfoundland. When we arrived at the campground overlooking the bay we discovered the iceberg. The lady working at the campground store told us to take a certain road to the other side of the bay to get a better view of the iceberg (shown below).

While I was photographing the iceberg I heard a whale blow and was thrilled to be able to photograph a mother and calf surfacing and blowing (below).

I compiled this 3-minute video showing icebergs and whales in the bay:
All of the whale sightings we experienced in Newfoundland were from shore. If you visit this beautiful province and want to see whales, I recommend you find a tour company that can take you by boat to get a closer view.
The best whale watching day we have experienced was in September 2003 in the Bay of Fundy off of Grand Manan, New Brunswick. We went out on a 40 foot sail boat (their sign is pictured below). Afterwards I spoke to one of the other passengers who was a professional photographer who had done this cruise every summer for the last 14 years and he said this was the best whale sighting day he ever had experienced.

We saw a basking shark that was longer than our boat (we knew this because the shark came alongside our boat) and later on we drifted beside a North Atlantic Right Whale and her calf for about 45 minutes (shown below). They were filter feeding at the surface. The captain used sail power to make sure we didn't get too close and disturb the whales with the noise of a motor. We felt privileged to have encountered these rare creatures, which are now listed as an endangered species.

Having had such a rare and wonderful whale watching opportunity, we don't bother going on any more whale cruises. How could we beat that day?!
The other piece of advice I would offer other tourists is to take every opportunity to speak to the local people of Newfoundland. They are proud of their piece of paradise and are happy to let you know about icebergs, whales, and any other exciting things to see in their area.
Where was your favourite whale watching experience? If you have comments to share, please do so using the 'Leave a Comment' button at the top of this post.
Subscribe to Karen's Newsletter for exclusive early access to new work, studio news updates, travel tales, painting tips, and notices of upcoming exhibitions.